Play invalid sound, load one in the background

To start there is a “beep” while the real audio loads in the background.
1. In the game object put the audio.
2. Put an audio listener too.
3. Reuse the Collision trigger script that played the sound.
4. Extend it to load audio as coprocess.
5. When the audio loads, swap it in.

[script]
public class ClickButton : MonoBehaviour {
bool clicked = false;
public float elapsedTime = 0.0f;

// Use this for initialization
void Start()
{
StartCoroutine(LoadClip());
}
void Update()
{
if (clicked)
{
AudioSource audio = GetComponent();
if (!audio.isPlaying)
{
clicked = false;
var tmp = transform.position;
tmp.x += .08f;
transform.position = tmp;
}
}
}
void OnMouseDown()
{
var tmp = transform.position;
if (!clicked)
{
clicked = true;
tmp.x -= .08f;
GetComponent().Play();
}
else
{
clicked = false;
tmp.x += .08f;
GetComponent().Stop();
}
transform.position = tmp;
}
IEnumerator LoadClip()
{
WWW www = new WWW(“http://www.tonycuffe.com/mp3/tail%20toddle.mp3”);

while (!www.isDone)
{
elapsedTime += Time.deltaTime;
yield return null;
}

// TODO – look for errors, try again, etc.
AudioSource audio = GetComponent();
audio.clip = www.GetAudioClip(false, false);

yield break;
}
}

[/script]
Unity Tasty Tidbits

Move an object like a button press.

[script]
var tmp = transform.position;
tmp.x += .08f;
transform.position = tmp;
[/script]

Respond to a button click

On a an object with box colllider.
“Is Trigger” is Checked.
Add the following script…
[script]
void OnMouseDown()
{
var tmp = transform.position;
if (!clicked)
{
clicked = true;
tmp.x -= .08f;
}
else
{
clicked = false;
tmp.x += .08f;
}
transform.position = tmp;
}
[/script]

Survival Shooter – Chapeter 3 – Camera

Change the camera to follow…

Go to MainCamera

Change X,Y,Z => 1, 15, -22

Rotation -> 30,0,0

Projection -> othographic with size 4.5

Background Color -> Black


Script time…

Create a script called CameraFollow and edit.


using UnityEngine;
using System.Collections;

public class CameraFollow : MonoBehaviour {
public Transform target;
public float smoothing = 5f;

private Vector3 offset;

void Start(){
offset = transform.position - target.position;

}
void FixedUpdate(){
Vector3 transformCamPos = target.position + offset;
transform.position = Vector3.Lerp (transform.position, transformCamPos, smoothing * Time.deltaTime);
}
}

<span style="line-height: 1.5;">

Make sure it compiles and drag/drop it into the camera object.


Survival Shooter – Chapter 2

Add the main character, “player”

Open the models folder, find it drag-and-drop it.

Make sure he is centered at 0,0,0(origin)

Tag player as “player”


Animation controller. Move, turn, etc.

You will create a folder called Animation, in there create a  new Animation Controller called PlayerAC

Drag and drop that into the player.

Double click on the PlayerAC object to invoke the editor.

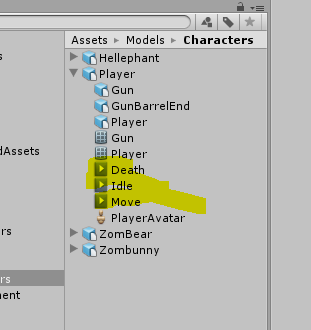
Now look at the player model and expand it.  There are some animations.  Drag and drop them into the Editor.

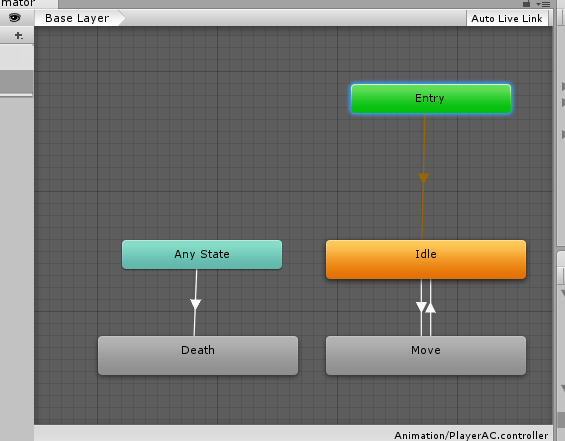
Make “Idle” the default. Right click, then “make default”, duh

Now we need to create the hooks so we can use these animations.  Create 2 new parameters.  IsWalking, Die

Now you can create some transitions that define how we logically go from one state to another.

Lets start with idle to move. Select idle, right click, choose make transition and link the event to move.  There is the link.

To edit the link,  click on it.  Then see the line.  Right click and find the Inspector.  Add the Condition IsWalking/True.

Make a reverse entry from move to idle with condition IsWalking/false

Since “die” can be called from any state,  create an event link from AnyState to Die.  Add the condition Die in the inspector.

That is it for now.


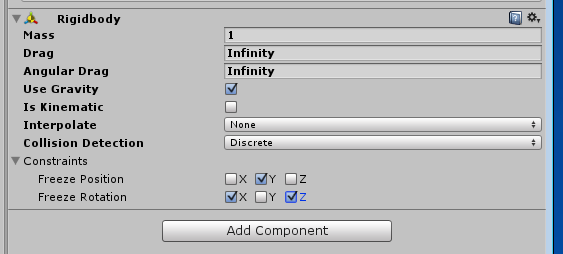
Back to char, add physics to our player – rigidbody(3d of course) and Capsule collider.

And of course sound. Add an audio source and the appropriate sound.


Move on to programming the movement.

You have:

FixedUpdate that runs on when rigid body moves

It calls three functions to do interesting things

Movement  – move our player

Turning — makes the camera follow the main guy around

Animating – set the “IsWalking” param of the animator we built above.

Because these programs were written for version 4, we can’t test the script until we fix the others.   Correct the missing references.


[script]
public class PlayerMovement : MonoBehaviour {
public float speed = 6;

private Vector3 movement;
private Animator anim;
private Rigidbody rb;

private int floormask; // raycast
private float camRayLength = 100f;

void Awake()
{
floormask = LayerMask.GetMask(“Floor”);
anim = GetComponent();
rb = GetComponent();
}

// physics update.
void FixedUpdate()
{
float h = Input.GetAxisRaw(“Horizontal”);
float v = Input.GetAxisRaw(“Vertical”);

Movement(h, v);
Turning();
Animating(h, v);
}
void Movement(float h, float v)
{
movement.Set(h, 0, v);
movement = movement.normalized * speed * Time.deltaTime;
rb.MovePosition(transform.position + movement);
}
void Turning()
{
Ray camRay = Camera.main.ScreenPointToRay(Input.mousePosition);
RaycastHit floorHit;
if (Physics.Raycast(camRay, out floorHit, camRayLength, floormask))
{
Vector3 playerToMouse = floorHit.point – transform.position;
playerToMouse.y = 0; // never leave the plane
Quaternion newRotation = Quaternion.LookRotation(playerToMouse);
rb.MoveRotation(newRotation);
}
}
void Animating(float h, float v)
{
bool walking = (h != 0) || (v != 0);
anim.SetBool(“IsWalking”, walking);
}

}
[/script]

Survival Shooter – Chapter 1

Start a 3d project

Find it  https://www.assetstore.unity3d.com/en/#!/content/40756

Load it into unity

Copy Environment prefab into scene

Copy lights prefab onto screen


We plan to use “Raycast” but don’t want to show on all the objects like the legos or the table.   [We know we are going to do something, but they arent specific.  Start by creating a quad called floor…]  This is the collider.

Create a quad – put it at origin, turn 90 on x.  Scale to 100×100

Name it “Floor”

Remove mesh-render component from floor.  You will see the collider (floor) outline.

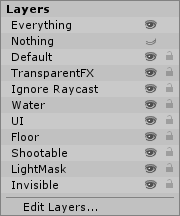
Go to the properties window and at the top – change the layer to “Floor”


That is it for now.


Music

Create a blank game object and name it to background-audio

Add the component (audio source)

Use circle-select to pick the audio clip.

Unckeck – play on awake,

Check loop

Adjust volume to 0.1


Unity Space Shooter – Chapter 6 – create laser prefab

Shot fire Object

A lot going on.

We create a game object called “Bolt” and add a child object(quad) called VFX.  We make this two parts so we can separate the logic from rendering.

  1.  Game Object  called “Bolt” This will be our primary shot object. The bolt object has movement(rigid body) and collision detection(capsule collider)
  2. Child Game object called VFX(quad) (transform rotate 90 to see)
  3. Create a material
    1. Go to material folder
    2. Create new new material and name it fx_bolt_orange
    3. Use the “select” picker to attach the texture of the bolt
    4. Select shading as mobile/particles/additive
  4. Drag and drop new material onto Quad
  5. Setup collision
    1. Remove “mesh collider” from VFX object(there by default)
    2. Go to Bolt and add component physics/capsule collider
      1. Adjust the size
      2. Change Direction to z-axis
    3. Select “isTrigger” checkbox to make it a “trigger collider”
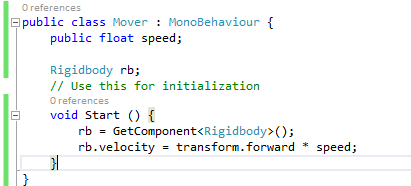
    4. Attach a new Script called “Mover”

    5. see the new public “speed” set that on the Bolt object(20 is ok)
    6.  Test by playing.
    7. Move it to Prefab
    8. Test by playing and drag and drop as often as you want.


Create new Material

fx_bolt_orange


REMEMBER * * *  CHANGES TO OBJECT PARAMETERS ARE NOT SAVED UNTIL YOU ARE OUT OF TEST-GAME MODE * * *


Yup. Working through the tuts.

Chapter 4.

Background:
Add 3d/quad

  1. Reset origin
  2. Rename it.
  3. Create the mesh renderer(background) texture, by dragging-and-dropping from the textures folder.
  4. Scale it to 15 x 30
  5. Cuts off the bottom of the player.  So set y to -10

  6. It looks all shiny, so we remove the light by going to mesh-renderer, shade: unit/texture

Chaper 5 – move the player using keyboard

Features: c#, and FixedUpdate()

  1. Select The object
  2. Add component – new script and call it PlayerController Best to start visual studio before trying the editor, else the thing get stuck with a “launching” button.(might be why stuff didn’t save when I left too.(?))

  3. We are using  the physics engine so these things are important

  4.  Note – this is what they say to use

I like how they build the variable starting with the prototype then fill each parameter in as they translate them

Then they translate them one by one.  Here we have no Y , so that is 0.  The rest is process of elimination.

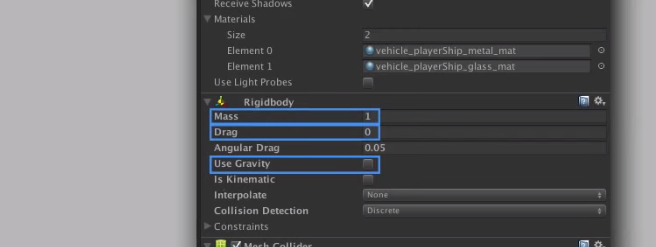
Studio complains because 5  doesnt have rigidbody.  Lets do this per the upgrade pdf.


We adjust our script accordingly.


Make it more responsive by using a public speed variable (and set to 13)

public float speed = 13;

rb.velocity = movement * speed;


Limit movement using Clamp function in the FixedUpdate routine.


Unity SpaceShooter – Chapter 4 – move player with keys