Survival Shooter – Chapeter 3 – Camera

Change the camera to follow…

Go to MainCamera

Change X,Y,Z => 1, 15, -22

Rotation -> 30,0,0

Projection -> othographic with size 4.5

Background Color -> Black


Script time…

Create a script called CameraFollow and edit.


using UnityEngine;
using System.Collections;

public class CameraFollow : MonoBehaviour {
public Transform target;
public float smoothing = 5f;

private Vector3 offset;

void Start(){
offset = transform.position - target.position;

}
void FixedUpdate(){
Vector3 transformCamPos = target.position + offset;
transform.position = Vector3.Lerp (transform.position, transformCamPos, smoothing * Time.deltaTime);
}
}

<span style="line-height: 1.5;">

Make sure it compiles and drag/drop it into the camera object.


Survival Shooter – Chapter 2

Add the main character, “player”

Open the models folder, find it drag-and-drop it.

Make sure he is centered at 0,0,0(origin)

Tag player as “player”


Animation controller. Move, turn, etc.

You will create a folder called Animation, in there create a  new Animation Controller called PlayerAC

Drag and drop that into the player.

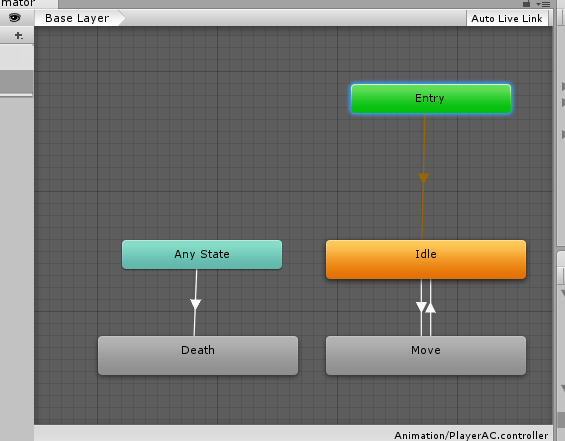
Double click on the PlayerAC object to invoke the editor.

Now look at the player model and expand it.  There are some animations.  Drag and drop them into the Editor.

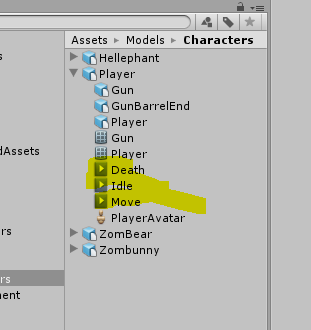
Make “Idle” the default. Right click, then “make default”, duh

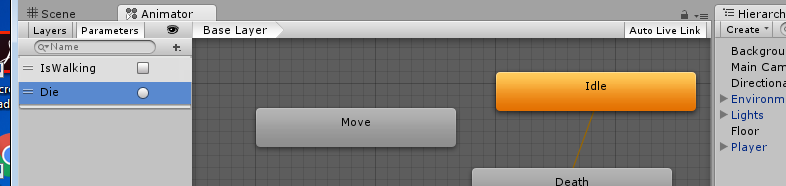
Now we need to create the hooks so we can use these animations.  Create 2 new parameters.  IsWalking, Die

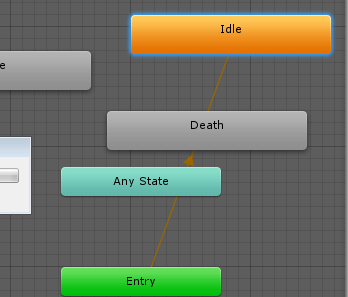
Now you can create some transitions that define how we logically go from one state to another.

Lets start with idle to move. Select idle, right click, choose make transition and link the event to move.  There is the link.

To edit the link,  click on it.  Then see the line.  Right click and find the Inspector.  Add the Condition IsWalking/True.

Make a reverse entry from move to idle with condition IsWalking/false

Since “die” can be called from any state,  create an event link from AnyState to Die.  Add the condition Die in the inspector.

That is it for now.


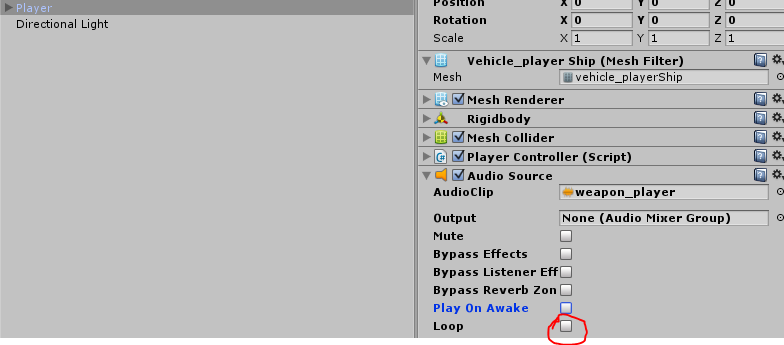
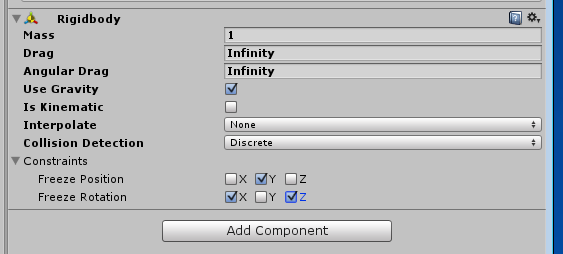
Back to char, add physics to our player – rigidbody(3d of course) and Capsule collider.

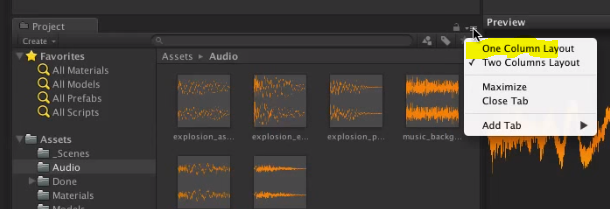
And of course sound. Add an audio source and the appropriate sound.


Move on to programming the movement.

You have:

FixedUpdate that runs on when rigid body moves

It calls three functions to do interesting things

Movement  – move our player

Turning — makes the camera follow the main guy around

Animating – set the “IsWalking” param of the animator we built above.

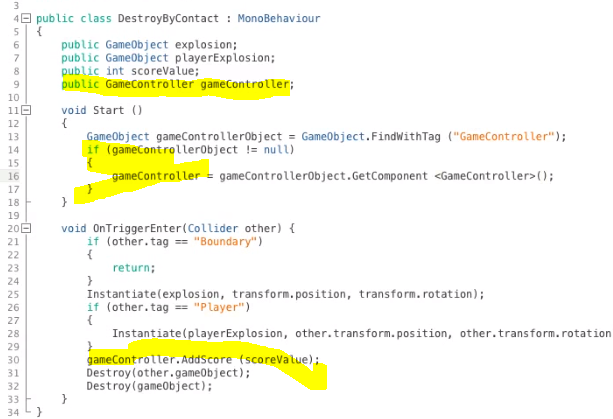
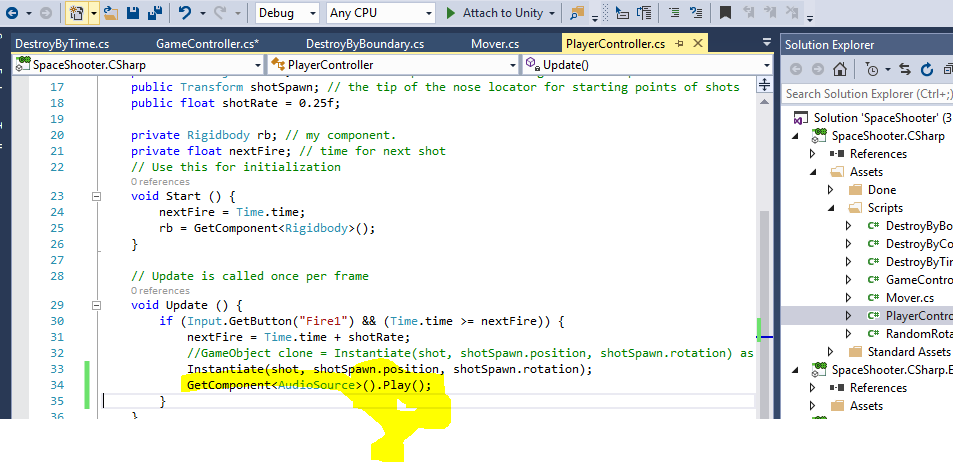
Because these programs were written for version 4, we can’t test the script until we fix the others.   Correct the missing references.


[script]
public class PlayerMovement : MonoBehaviour {
public float speed = 6;

private Vector3 movement;
private Animator anim;
private Rigidbody rb;

private int floormask; // raycast
private float camRayLength = 100f;

void Awake()
{
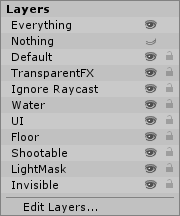
floormask = LayerMask.GetMask(“Floor”);
anim = GetComponent();
rb = GetComponent();
}

// physics update.
void FixedUpdate()
{
float h = Input.GetAxisRaw(“Horizontal”);
float v = Input.GetAxisRaw(“Vertical”);

Movement(h, v);
Turning();
Animating(h, v);
}
void Movement(float h, float v)
{
movement.Set(h, 0, v);
movement = movement.normalized * speed * Time.deltaTime;
rb.MovePosition(transform.position + movement);
}
void Turning()
{
Ray camRay = Camera.main.ScreenPointToRay(Input.mousePosition);
RaycastHit floorHit;
if (Physics.Raycast(camRay, out floorHit, camRayLength, floormask))
{
Vector3 playerToMouse = floorHit.point – transform.position;
playerToMouse.y = 0; // never leave the plane
Quaternion newRotation = Quaternion.LookRotation(playerToMouse);
rb.MoveRotation(newRotation);
}
}
void Animating(float h, float v)
{
bool walking = (h != 0) || (v != 0);
anim.SetBool(“IsWalking”, walking);
}

}
[/script]

Survival Shooter – Chapter 1

Start a 3d project

Find it  https://www.assetstore.unity3d.com/en/#!/content/40756

Load it into unity

Copy Environment prefab into scene

Copy lights prefab onto screen


We plan to use “Raycast” but don’t want to show on all the objects like the legos or the table.   [We know we are going to do something, but they arent specific.  Start by creating a quad called floor…]  This is the collider.

Create a quad – put it at origin, turn 90 on x.  Scale to 100×100

Name it “Floor”

Remove mesh-render component from floor.  You will see the collider (floor) outline.

Go to the properties window and at the top – change the layer to “Floor”


That is it for now.


Music

Create a blank game object and name it to background-audio

Add the component (audio source)

Use circle-select to pick the audio clip.

Unckeck – play on awake,

Check loop

Adjust volume to 0.1


Unity Space Shooter – Chapter 17 – Extending

Add new asteroid types

  1. Start by duplicating (2x) the asteroid object(drag from prefab) to scene.


  1. Customize each one by replacing the model with the alternates.
  2. Adjust the colliders.
  3. Rename and save as new prefabs.

Change the GameController to spawn all three

Change

public GameObject hazard;

to

public GameObjects[] hazards;


Change the spawn to select a random one from the list.

Remember to go back to the GameController Object and add those prefabs to the hazards list.


Star Field

Drag and drop the prefab starfield into the scene

Set the Y to just above the background.

Optionally fiddle with the lifetime and speed constants.


Rolling Cloud

Duplicate the Background as a child of background

Use the transform too. and Use vertex snapping(v) to get them butted from end to end.

This gives you two whole pieces to run.  The image is built to be seamless.

Add a new c# backgroundScroller script.  Not the mathf.repeat.  This is the key.


Enemies

So much

Create empty “Enemy” placeholder object and fill it with the model and exhaust model.

add rigid body and collider, then adjust.

Add movement compoent and make the value -5.

Add the destroy by contact component.

Make it a Prefab

Add the prefab to the gamecontroller’s list of hazards.

Run it.


Evasive manuver


Unity Space Shooter – Chapter 14 – Score Inside and Outside

Inside

You’ve seen it before.  Add these publics to the the GameController.

Then Add the components on the screen, then drag and drop.

Include UpdateScore() in the Start routine.

Outside

Make a public addscore routine in game controller

In any routine that needs to add a score, get a reference to the GameController, then at the right time, call the new routine. ( the AddScore() routines above doesnt match below, but  you get the picture.)


Unity Space Shooter – Chapter 13 – Sounds

Music… Drag and drop the music to the GameController Object(play on awake, loop)


Drag and drop audio into the prefabs like explosion and you don’t have to program anything.

Then drag and drop the audio clip and confirm “play on awake” is checked.

That takes care of explosions. Now shooting.

Drag and drop the audio clip onto the player object.(no play on awake)